
All it takes is just a little bit of effort and creativity, to learn to do beautiful nail art at home! These 6 easy tricks and tips will show you how to make salon-quality nail designs on your own, so you can cut the line and save yourself plenty of time and money.
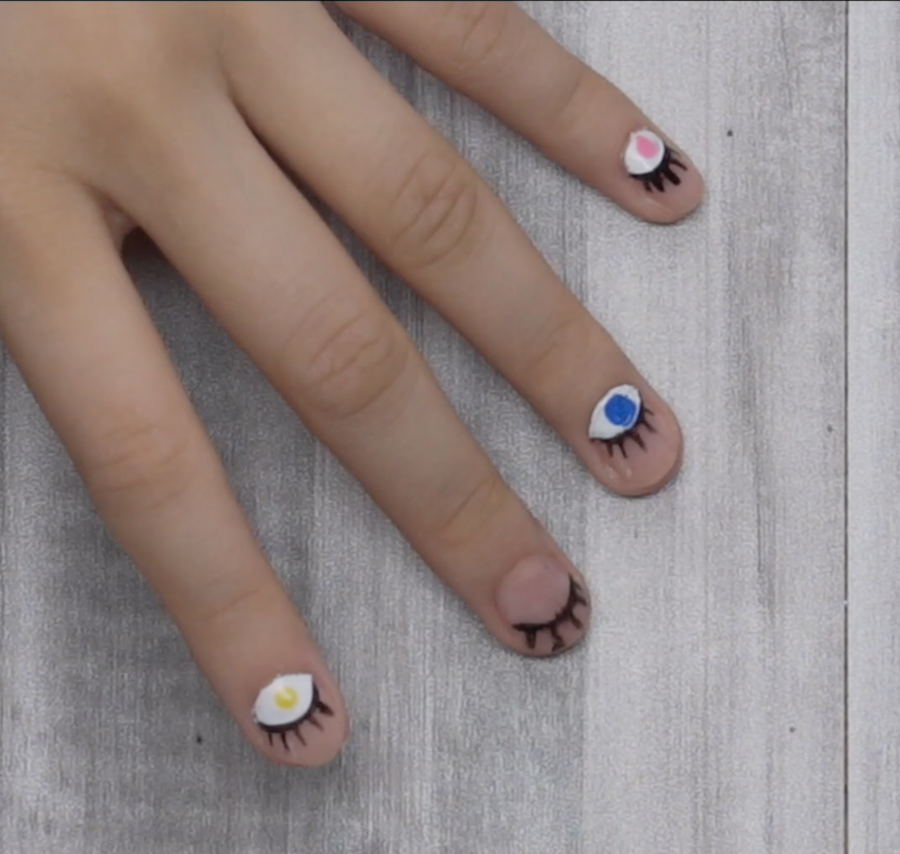
Chic Eyes Nail Art
Materials
1 Nail Art Brush
1 Ballpoint Pin
Nail Liquid Tape
Nail Base Coat
Nail Polish (White, Blue, Black)
Instructions
- Brush the liquid tape around the cuticles of your nails.
- Apply a layer of base coat on your nails, dip nail art brush in black polish and paint a half circle and dashes around it to resemble eyelashes.
- Fill in the half circle with white polish, dip the ballpoint pin in blue polish and dab a dot in the center of the circle.
- Peel off the liquid tape, and this chic, girly nail design is done!
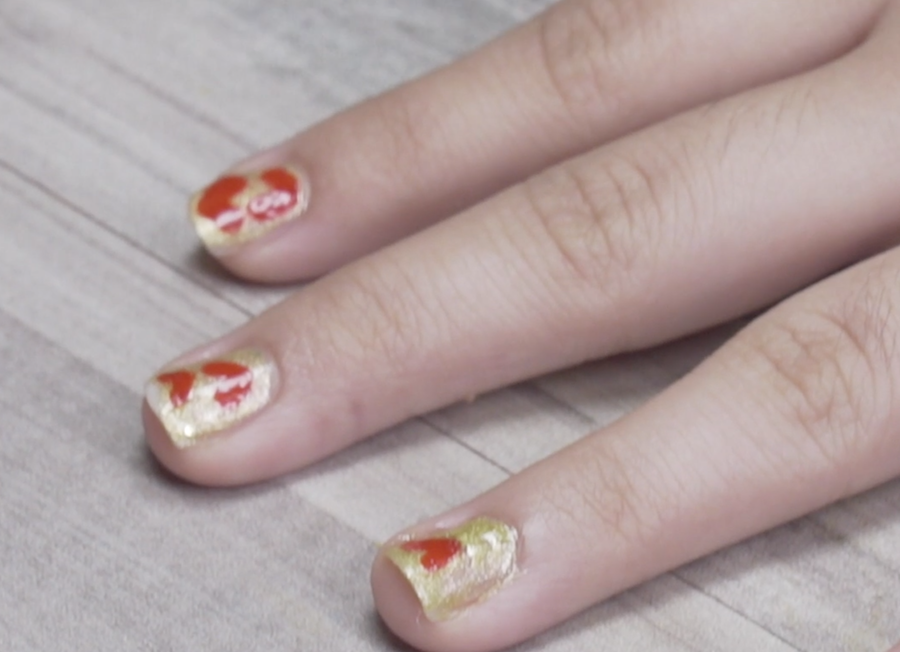
Glittery Heart Nail Design
Materials
1 Tweezer
1 Nail Art Brush
A Sheet of Plastic Film
Nail Liquid Tape
Nail Base Coat
Nail Polish (Gold Glitter, Silver Glitter, Red, Gray)
Instructions
- Brush the liquid tape around the cuticles of your nails.
- Apply a layer of base coat on your nails, paint your nails with the gold glitter polish.
- Use a thin wire or nail art brush to paint 15 red heart shapes on the plastic sheet.
- Apply another layer of base coat on top of the glitter polish, while it’s not completely dried, peel off a heart with the tweezer and place it on your nails.
- Seal your nail design with a last layer of base coat. Peel off the liquid tape. There you have it, a cute nail design perfect for Valentine’s or every day.
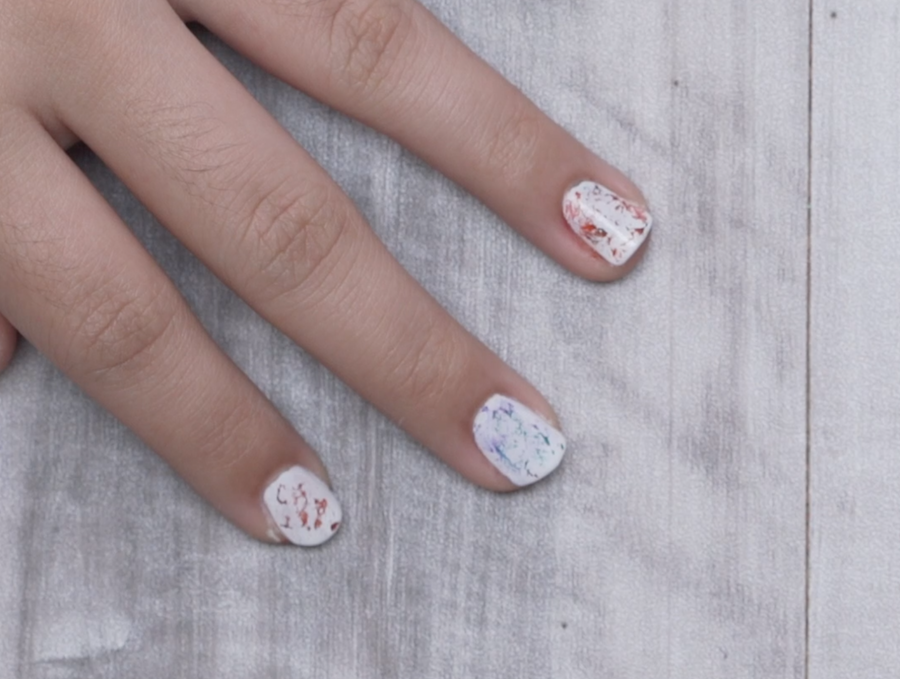
Easy Marble Nail Art
Materials
1 Cotton Swab
Nail Liquid Tape
Nail Base Coat
Nail Polish (White)
Marker Pens
Instructions
- Brush the liquid tape around the cuticles of your nails.
- Apply a layer of base coat on your nails, paint your nails with the white polish.
- After the polish is dried, take the markers and draw random circles on your nails, use at least 3 different colored markers on one nail.
- While the marker has not yet dried, take the cotton swab and quickly swirl it around your nails to create marbling.
- Seal your nail design with a layer of base coat. Peel off the liquid tape. Foolproof marble nails done!
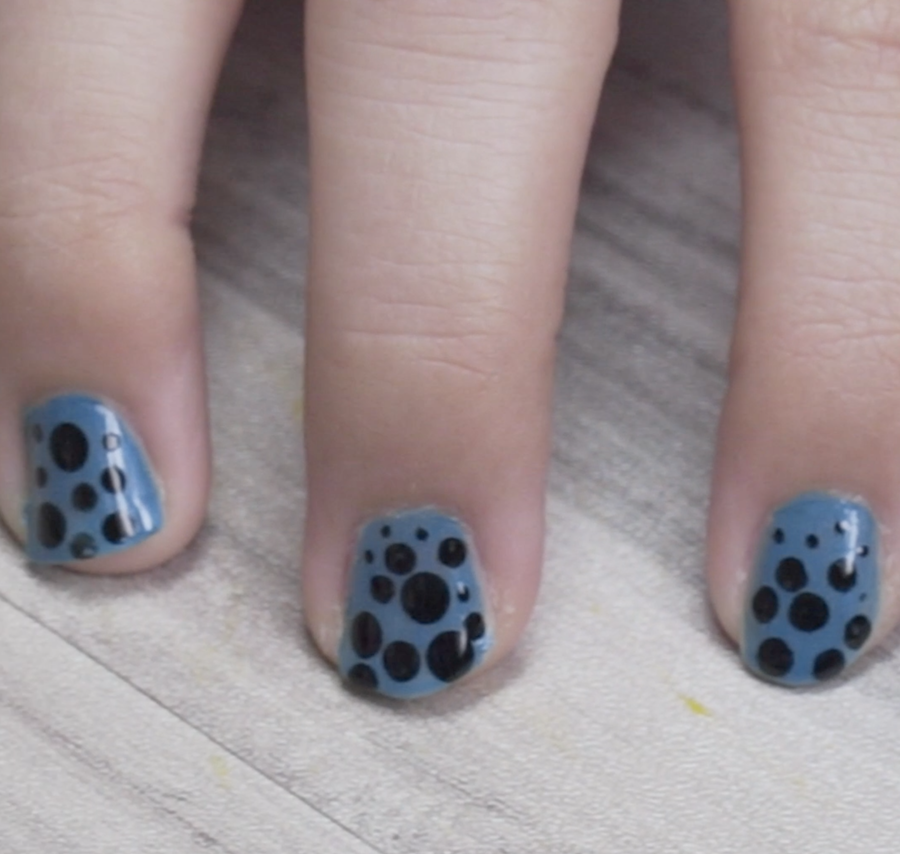
Cute Polka Dots Nails
Materials
1 Ballpoint Pin
Nail Liquid Tape
Nail Base Coat
Nail Polish (Blue, Black)
Instructions
- Brush the liquid tape around the cuticles of your nails.
- Apply a layer of base coat on your nails, paint your nails with the blue polish.
- Dip the ballpoint pin in black polish, dab it on your nails to create circles large and small.
- Seal your nail design with a layer of base coat. Peel off the liquid tape.
Glittery Striped Nail Art
Materials
A Pair of Scissors
Nail Liquid Tape
Nail Base Coat
Nail Polish (Orange Glitter, Silver Glitter, Gray)
Clear Packing Tape
Instructions
- Brush the liquid tape around the cuticles of your nails.
- Apply a layer of base coat on your nails, paint your nails with the orange glitter polish.
- Cut off a piece of tape, paint the gray polish over one half of the tape and the silver glitter polish over the other half.
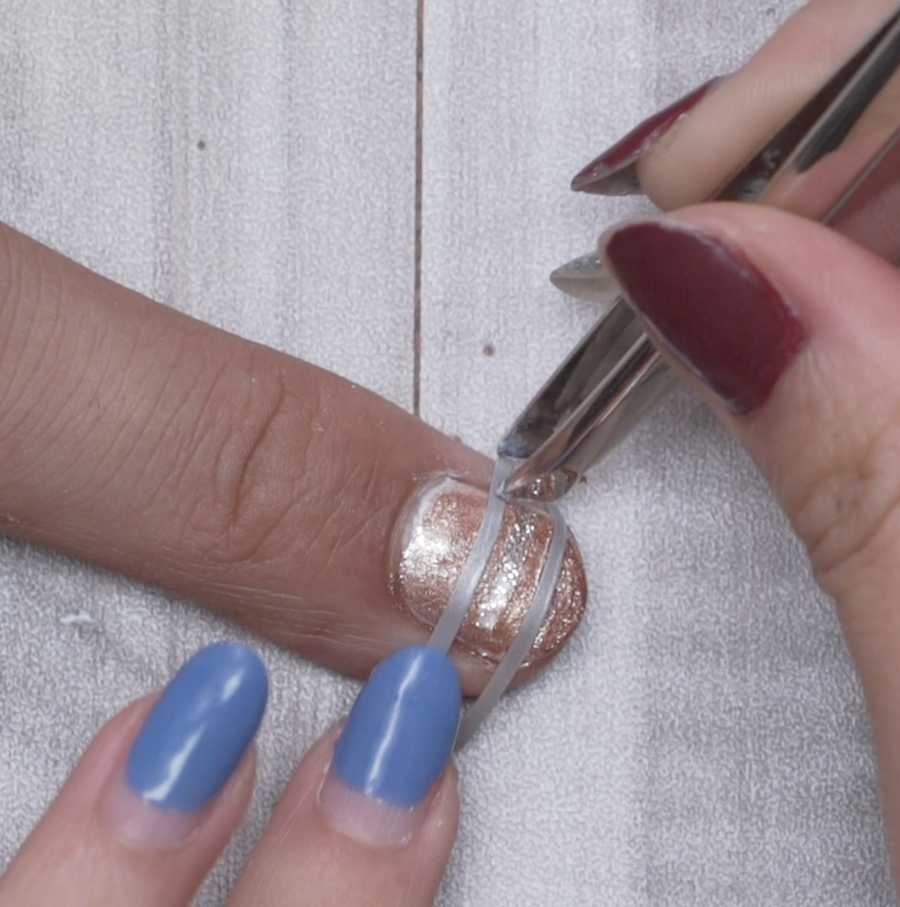
- Use scissors to cut the silver and gray polish into thin strips.
- Tape one strip of gray tape on the end of your nails, followed by the silver glitter, repeat this to get a total of four strips on each nail. Cut off excessive long strips on the end.
- Seal your nail design with a layer of base coat. Peel off the liquid tape.
Honey Bees Nail Art
Materials
Toothpicks
Cotton Swabs
Nail Liquid Tape
Nail Base Coat
Nail Polish (Blue, White, Yellow, Black)
Instructions
- Brush the liquid tape around the cuticles of your nails.
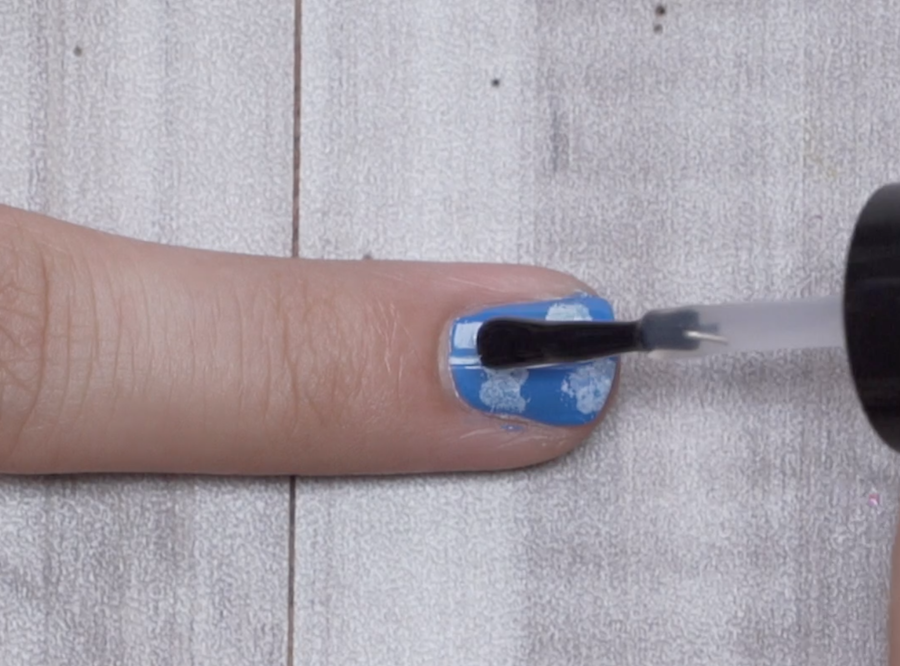
- Apply a layer of base coat on your nails, paint your nails with the blue polish.
- Dip the cotton swab in white polish and dab it on your nails to create clouds. Seal the nail design with a layer of base coat.
- Dip the cotton swab in yellow polish, dab a circle on your nails to create the body of the bee.
- Dip the toothpick in black polish, paint stripes on the yellow circle and small dots.
- Dip the toothpick in white polish and draw a small pair of wings on top of the bee’s body.
- Seal your nail design with a layer of base coat. Peel off the liquid tape.
If you enjoyed these 6 nail art tutorials, you may also like our 7 Easy Nail Designs to Get Salon-Quality Nails at Home
Video Tutorial
Follow our video tutorial above and check out our end results!
Tried making it at home? Share your results with us on Facebook, or Instagram


