
There’s no denying that every girl wants to have beautiful nails. Trips to the nail salon are like a ritual, even if it means emptying our purses. Actually, quality nail art is not hard to tackle, with some simple tips and tricks you too can create cute nails at home. Here we have 8 easy and pretty nail art tutorials for beginners!
Cute Ball Point Pins Nail Art Hack
Materials
1 Toothpick
3 Ball Point Pins
Nail Liquid Tape
Nail Base Coat
Nail Polish (Black, Pink, Yellow, Blue)
Instructions
- Brush liquid tape around the cuticles of your nails.
- Apply a layer of base coat on your nails, then paint black nail polish and let it dry.
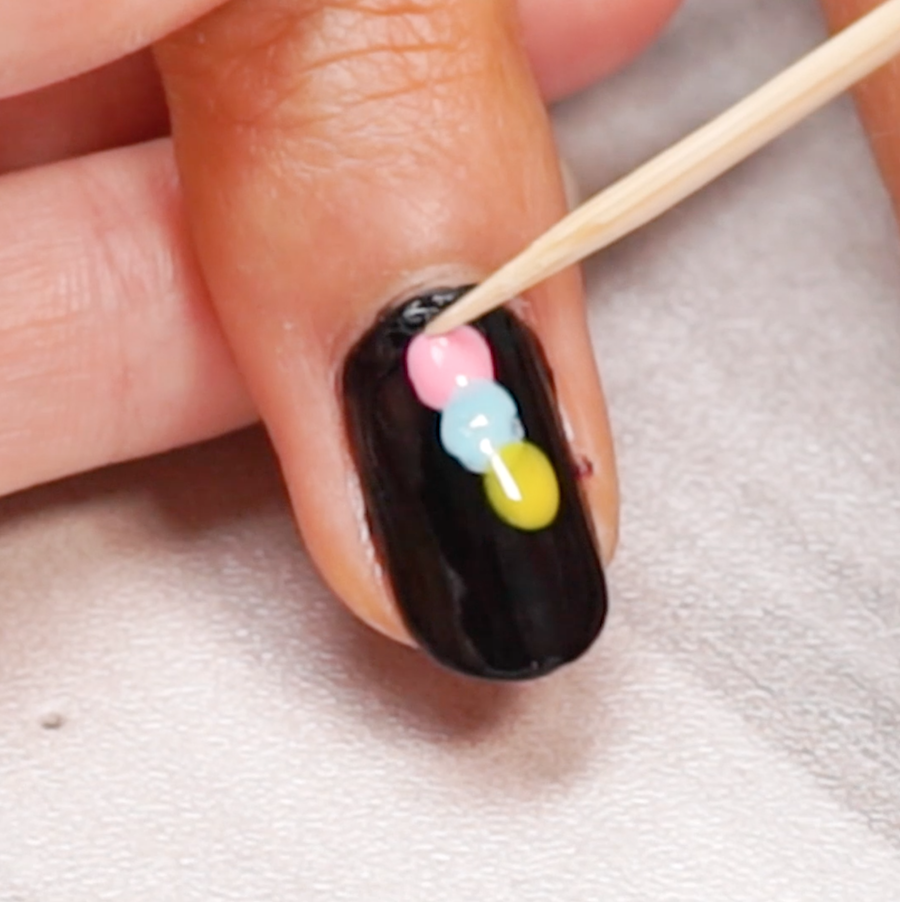
- Dip the ball-point pin into a colored nail polish, then dab on your nail. Apply a different color on top of each other vertically.
- Before the polish dries, run a toothpick through the center of the three circles.
- Finish off with a layer of base coat.
- Peel off the liquid tape.
Galaxy Nail Art
Materials
1 Makeup Sponge
Nail Liquid Tape
Nail Base Coat
Nail Polish (Light Blue, Dark Blue, White, Glitter)
Instructions
- Brush liquid tape around the cuticles of your nails.
- Apply a layer of base coat on your nails, then paint dark blue nail polish and let it dry.
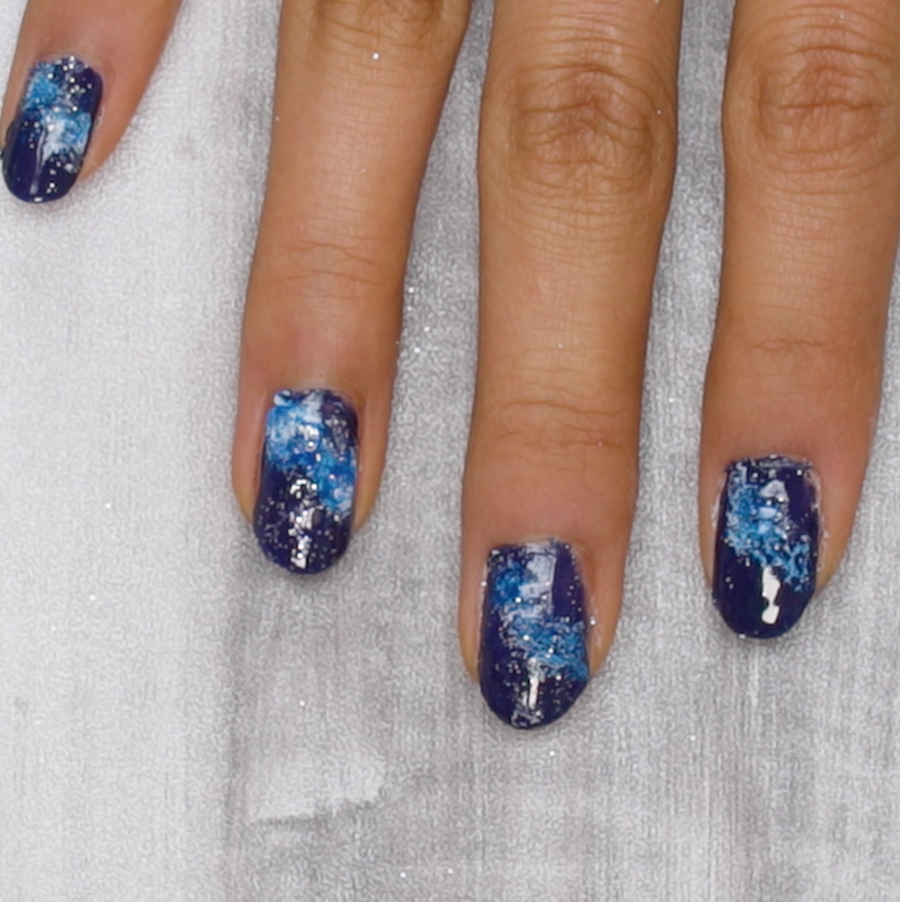
- Cut off a small piece of the makeup sponge, dip it in white nail polish and dab it over your nails.
- Repeat step 3 using the light blue nail polish then the glitter polish and let it dry.
- Finish off with a layer of base coat.
- Peel off the liquid tape.
Desert Cactus Nail Art
Materials
1 Toothpick
2 Matchsticks
Nail Liquid Tape
Nail Base Coat
Nail Polish (Green, Dark Green, Pink, Black)
Instructions
- Brush liquid tape around the cuticles of your nails.
- Apply a layer of base coat on your nails, then paint pink nail polish and let it dry.
- Dip the matchstick in the green polish and paint an oval shape on your nails.
- Use the same method to paint a dark green long circle on top of it.
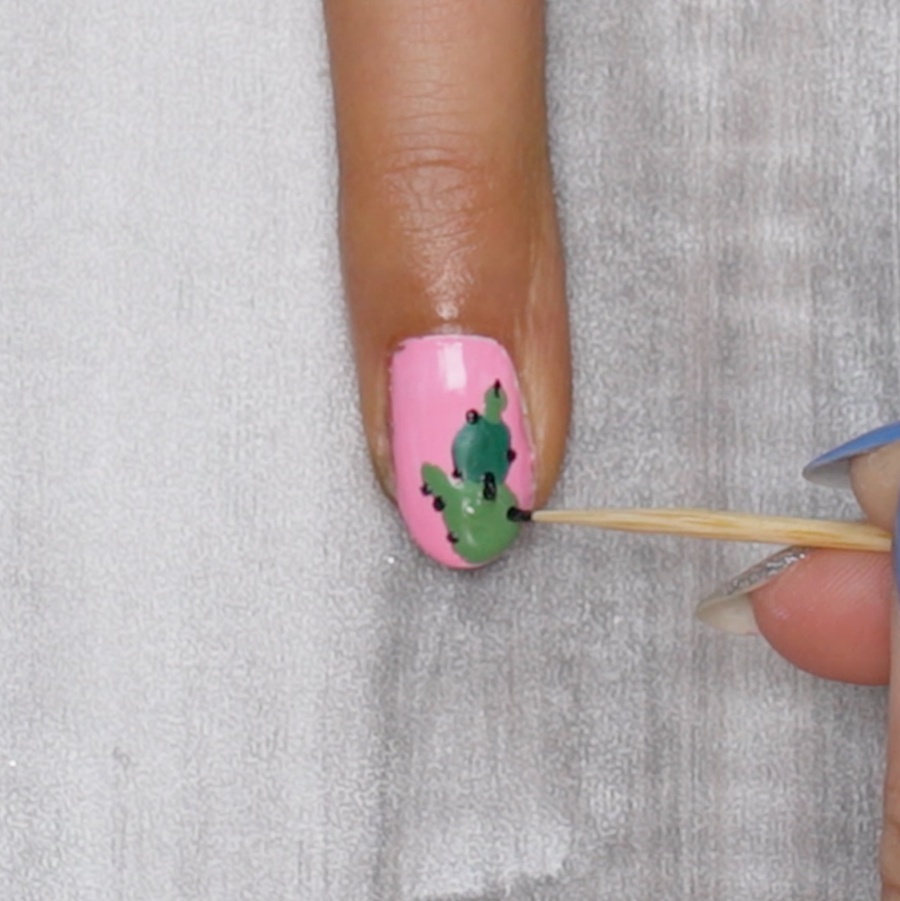
- Then paint a small green circle on top of the two circles.
- Dip a toothpick in black polish and paint dots around the cactus to resemble the thorns.
- Finish off with a layer of base coat.
- Peel off the liquid tape.
Pink Flamingo Nail Art
Materials
1 Makeup Sponge
Toothpicks
Nail Liquid Tape
Nail Base Coat
Nail Polish (White, Light Blue, Dark Blue, Pink, Black)
Instructions
- Brush liquid tape around the cuticles of your nails.
- Apply a layer of base coat on your nails, then paint white nail polish and let it dry.
- On a makeup sponge, apply a streak of white polish, followed by a streak of the light blue and dark blue polish.
- Dab the sponge onto the tip of your nails to create a gradient blue effect.
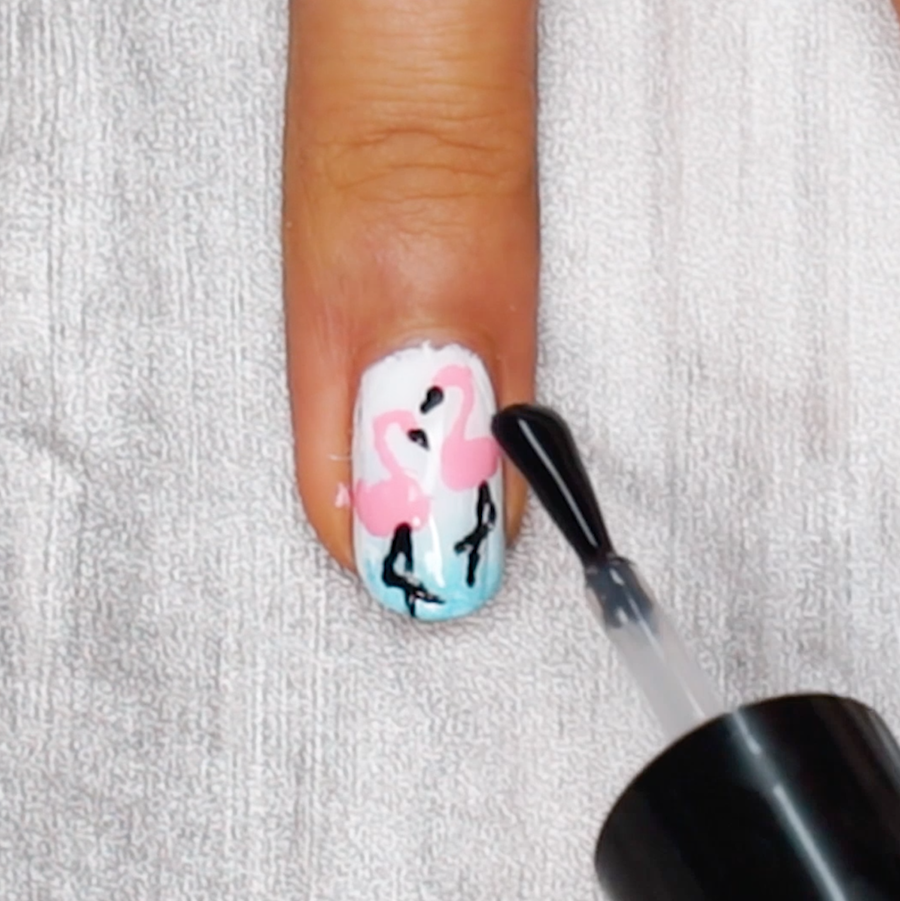
- Dip a toothpick in pink polish and draw the bodies of two flamingos on your nails, then dip it in black polish to draw the legs and beak.
- Finish off with a layer of base coat.
- Peel off the liquid tape.
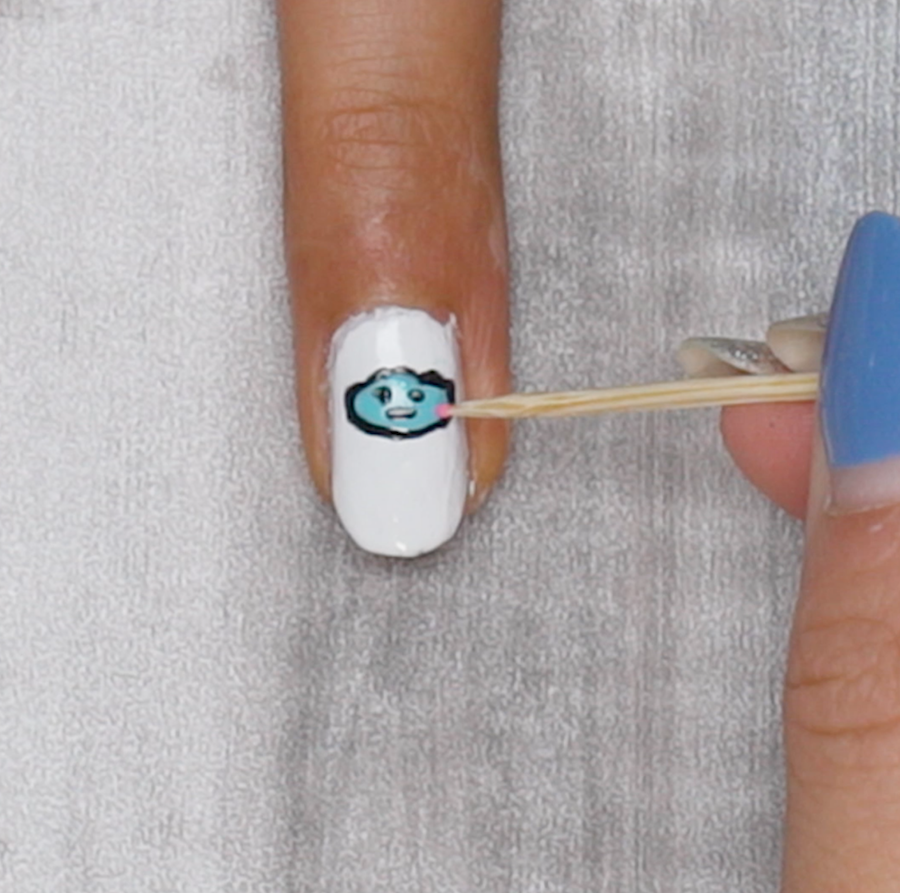
Smiling Cloud Nail Art
Materials
1 Nail Art Brush (or just use toothpicks)
1 Cotton Swab
Toothpicks
Nail Liquid Tape
Nail Base Coat
Nail Polish (White, Black, Blue, Pink)
Instructions
- Brush liquid tape around the cuticles of your nails.
- Apply a layer of base coat on your nails, then paint white nail polish and let it dry.
- Dip the nail art brush in black polish and draw a cloud on your nails.
- Dip a cotton swab in blue polish and color in the cloud.
- Dip a toothpick in black polish and draw a smiley face in the cloud, then dip it in pink polish to paint blush on the two sides of the smiling cloud.
- Finish off with a layer of base coat.
- Peel off the liquid tape.
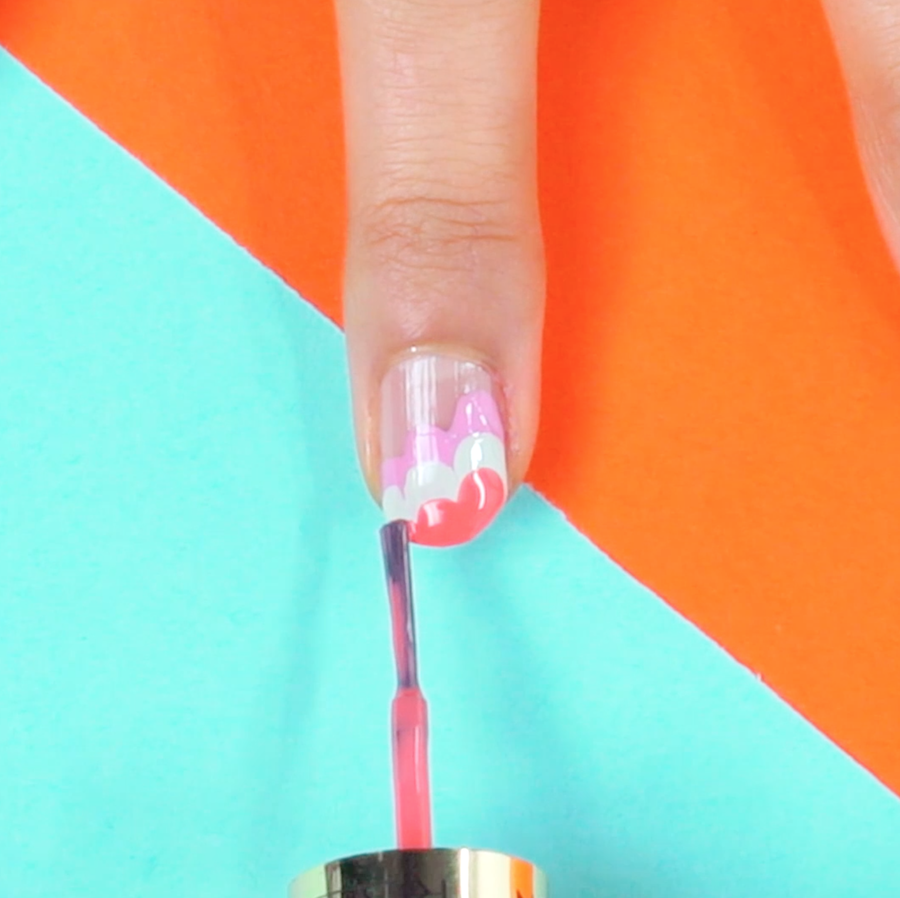
Simple Chic Nail Art
Materials
Nail Liquid Tape
Nail Base Coat
Nail Polish (Pink, Blue, Coral)
Instructions
- Brush liquid tape around the cuticles of your nails.
- Apply a layer of base coat on your nails, let it dry.
- Paint three brush strokes from your pink nail polish towards the tip of your nails, it kind of resembles the Adidas logo except there’s no space in between.
- Once it dries, paint the blue polish in the same manner directly on top and smaller than the pink polish so it appears to sit inside and on top of it the pink strokes.
- Then paint the coral polish inside and on top of the blue polish.
- Finish off with a layer of base coat.
- Peel off the liquid tape.
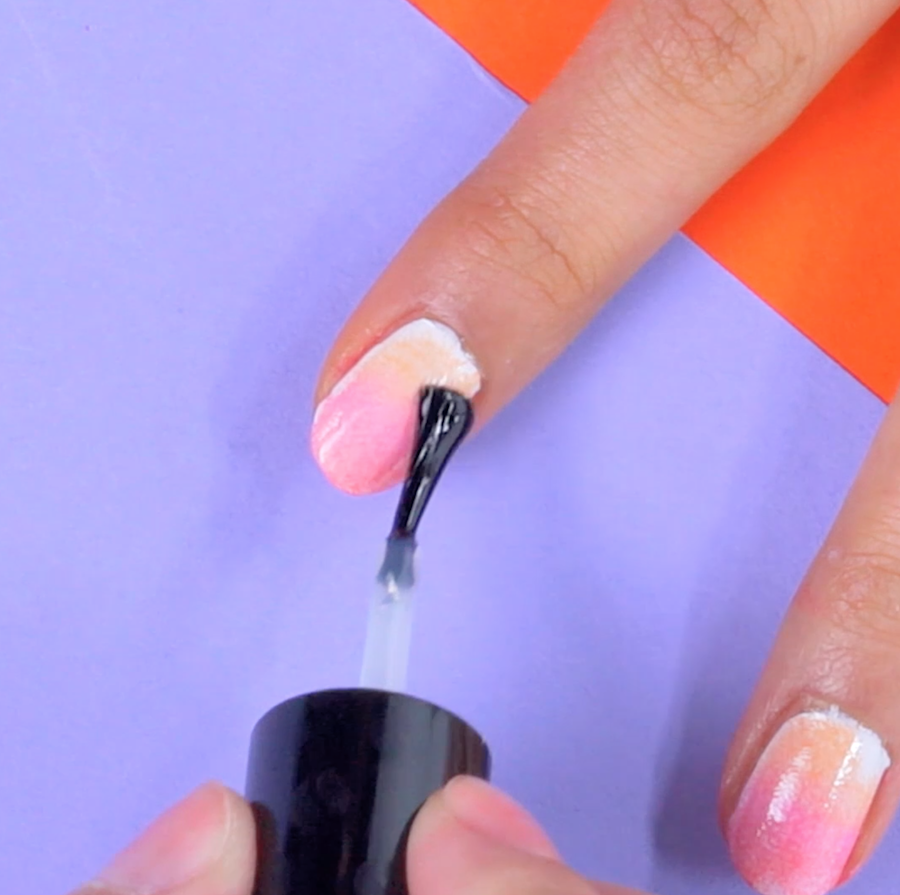
Beautiful Ombre Nail Art
Materials
1 Makeup Sponge
Nail Liquid Tape
Nail Base Coat
Nail Polish (Orange, Pink, Coral)
Instructions
- Brush liquid tape around the cuticles of your nails.
- Apply a layer of base coat on your nails, then paint white nail polish and let it dry.
- On a makeup sponge, apply a streak of orange, pink and coral polish.
- Dab the sponge onto your nails to create a beautiful ombre effect.
- Finish off with a layer of base coat.
- Peel off the liquid tape.
Video Tutorial
Follow our video tutorial above and check out our end results!
Tried making it at home? Share your results with us on Facebook, or Instagram.


