
Embroidery is an excellent method for those of you looking to embellish and style your clothes, it allows you to personalize and play with any type of designs of your choice. If you thought sewing is arduous to learn, fear not, these 4 easy, beautiful stitching techniques will help you learn the process quick and effortlessly.
Easy 3D Flower Embroidery
Materials
1 Shirt
1 Needle
1 Scissor
1 Embroidery Hoop
Embroidery Floss (Pink, Green)
Instructions
- Locate the area of the shirt which you want to embroider, place the fabric into the embroidery hoop and secure it tightly.
- Thread the needle with green embroidery floss, pass the needle through the fabric and stitch a 4 inch long straight line in running stitch style, this would be the stem.
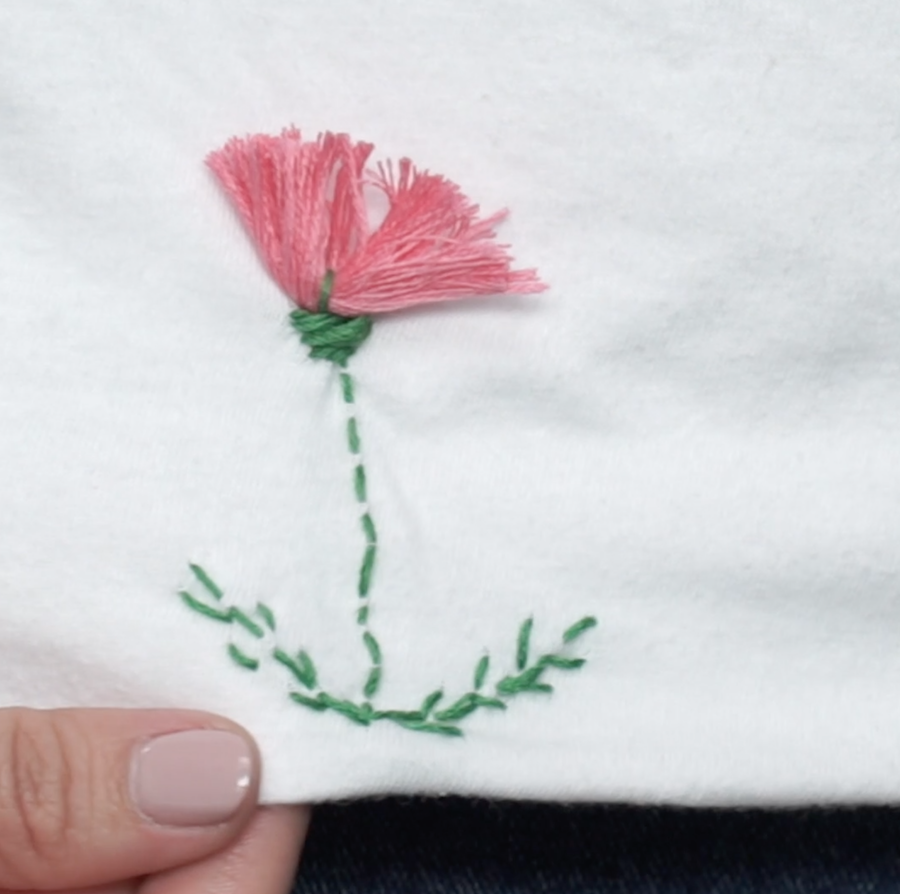
- Sew a 2-inch long diagonal feather stitch around the left and right side of the bottom stem to resemble leaves.
- Take the pink embroidery floss and wind it into a spool, place the spool on top of the running stitch stem. Pass the needle over the middle of the spool once to sew it onto the fabric, then sew horizontally around the bottom of the spool 8-10 times to create the receptacle of the flower.
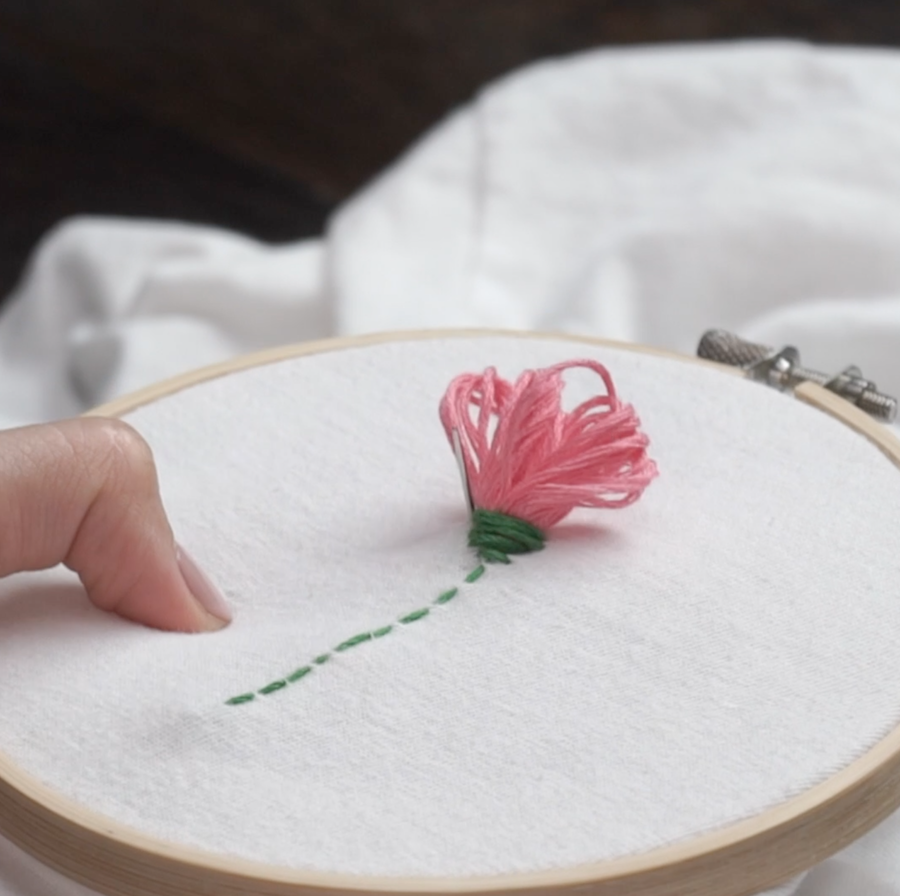
- Slide the scissor through the top loops of the pink spool to cut it open, brush the flosses neatly and trim the ends to make it even. A cute flower embroidery is done, isn’t it as easy as 1,2,3?
Weave-stitched Heart Embroidery
Materials
1 Shirt
1 Needle
1 Embroidery Hoop
1 Scissor
Embroidery Floss (Red)
Instructions
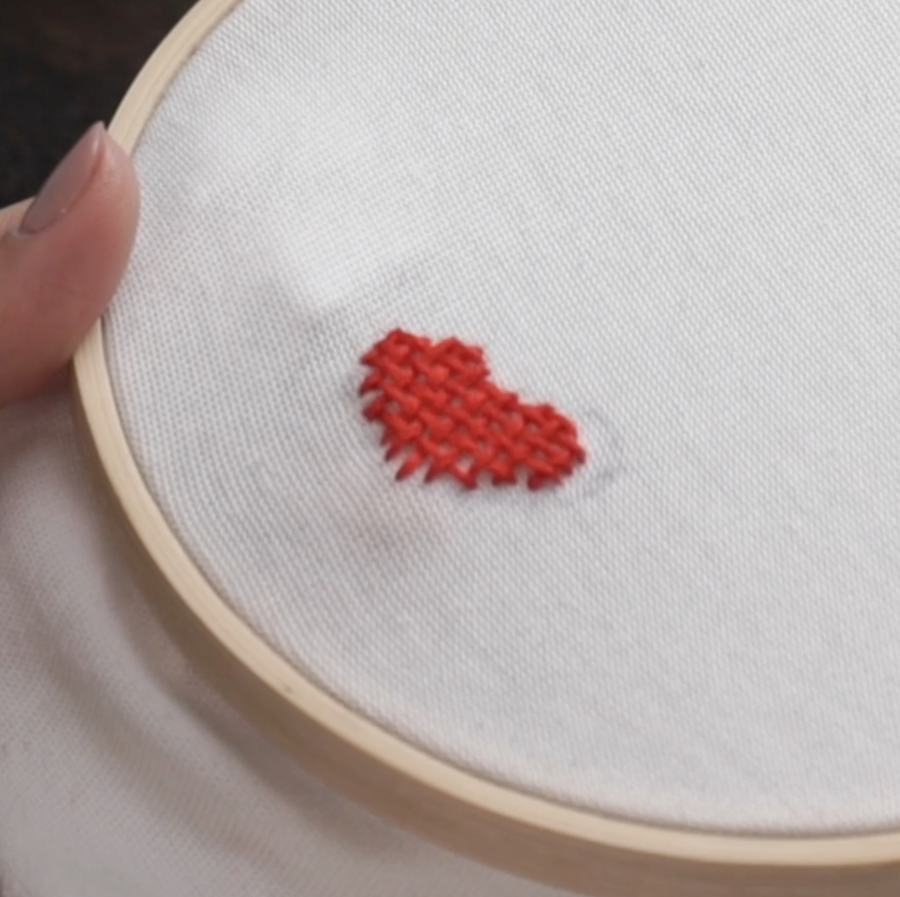
- Locate the area of the shirt which you want to embroider, place the fabric into the embroidery hoop and secure it tightly, draw a heart shape on the fabric.
- Thread the needle with red embroidery floss, pass the needle through the side of the heart and make vertical stitches inside the heart.
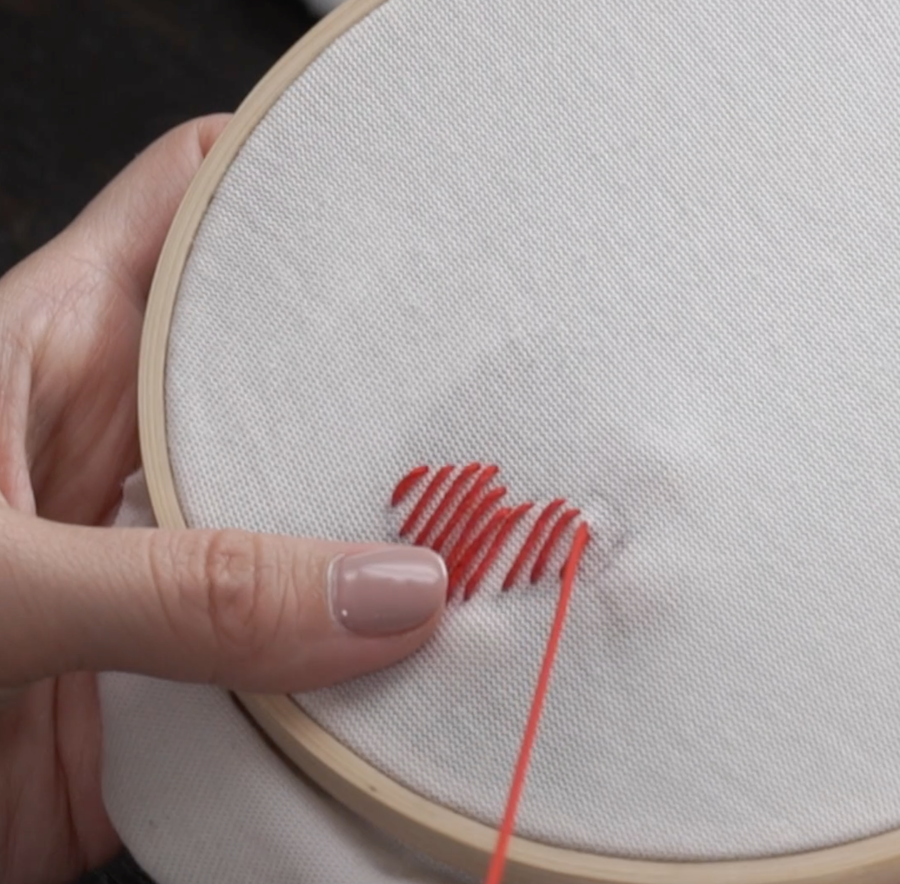
- When you’ve reached the end of the heart, pass the needle back to the front side and make horizontal weave stitches from the top of the heart, bring the needle over and under each vertical stitch to create a weave-like pattern over the heart until the stitches cover the entire heart.
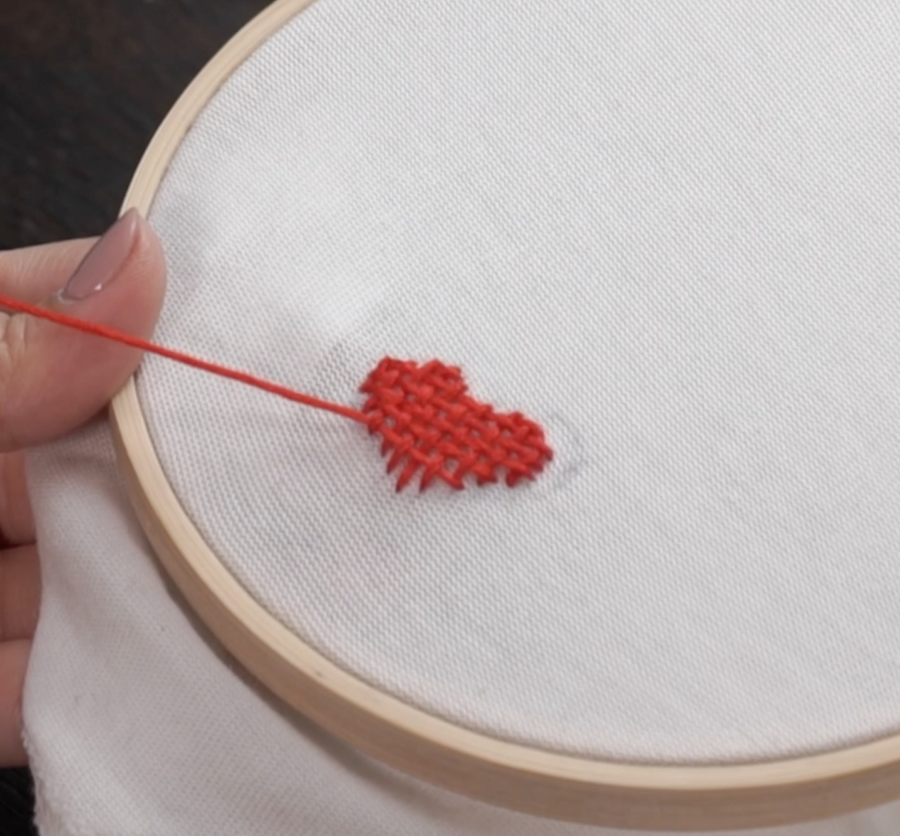
- Finish off by bringing the thread to the back side of the fabric, secure a knot over the stitches and cut off excess thread.
Cute Cherry Neckline Embroidery Pattern
Materials
1 Shirt
1 Scissor
1 Needle
1 Embroidery Hoop
Embroidery Floss (Green, Red)
Instructions
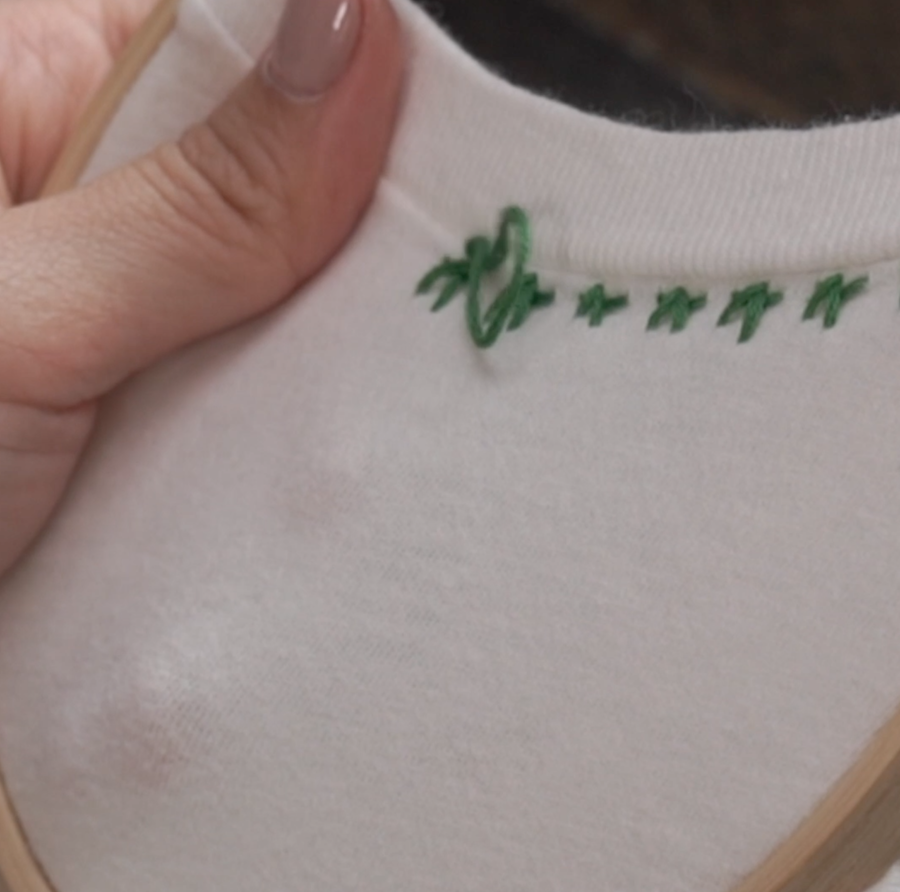
- Place the neckline area of the shirt into the embroidery hoop and secure it tightly.
- Thread the needle with green embroidery floss, starting at the side of the neckline, pass the needle through the fabric to make a straight stitch, then make two other straight stitches over the previous to create a star shape. Continue embroidering until you made 10 stars across the neckline.
- Thread the needle with red embroidery floss, pass the needle through the backside of the fabric to the front, make a knot on the floss and pass the needle through the knot to create a dot.
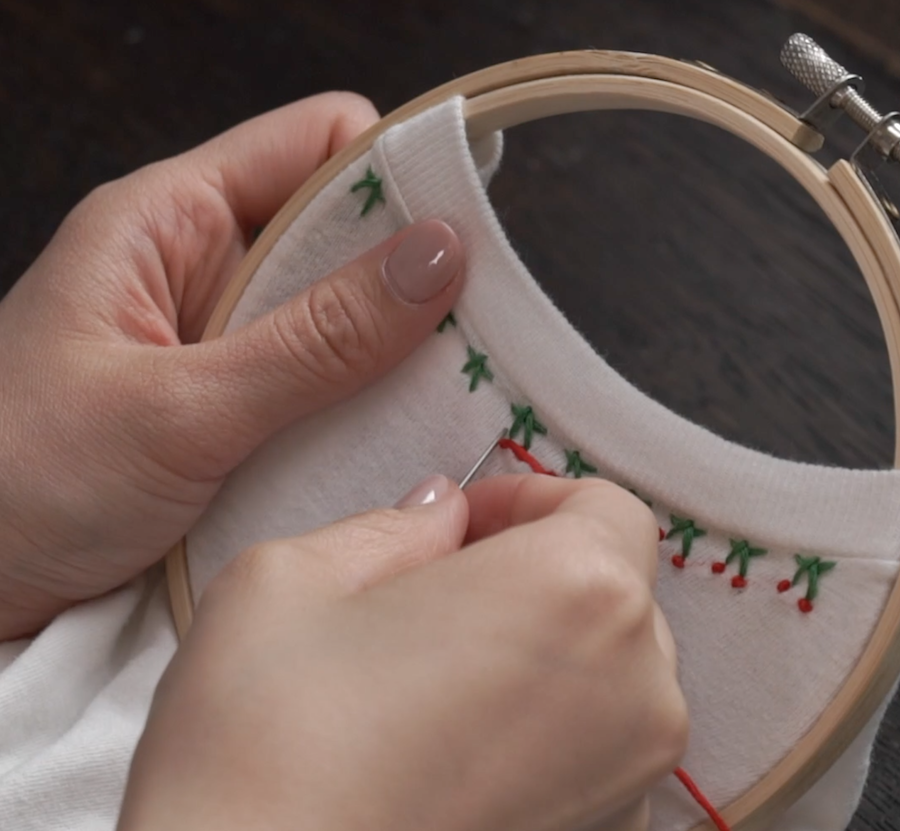
- Stitch 2 dots under each star and continue stitching until you’re done embroidering dots under all 10 stars.
Beautiful Rose Embroidery
Materials
1 Shirt
1 Needle
1 Scissor
1 Embroidery Hoop
Embroidery Floss ( Pink, Green)
Instructions
- Locate the area of the shirt which you want to embroider, place the fabric into the embroidery hoop and secure it tightly.
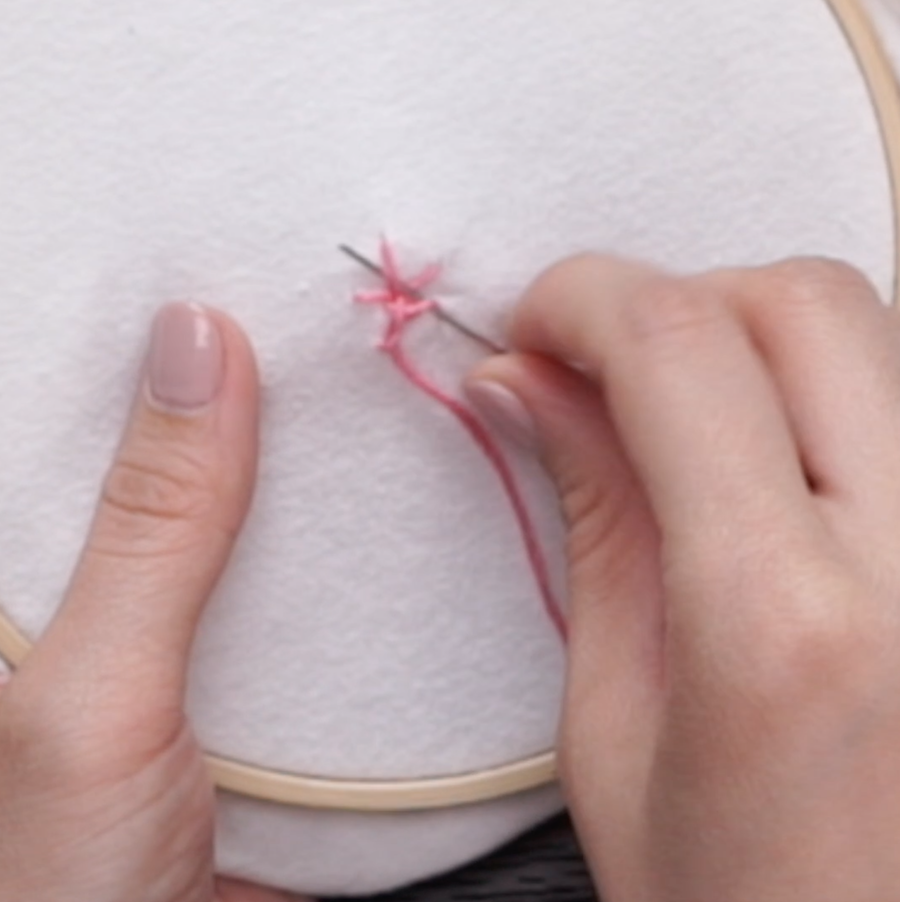
- Thread the needle with pink embroidery floss, pass the needle through the backside of the fabric to the front and make a straight stitch, then continue to make 4 more straight stitches evenly around to create an asterisk-like shape.
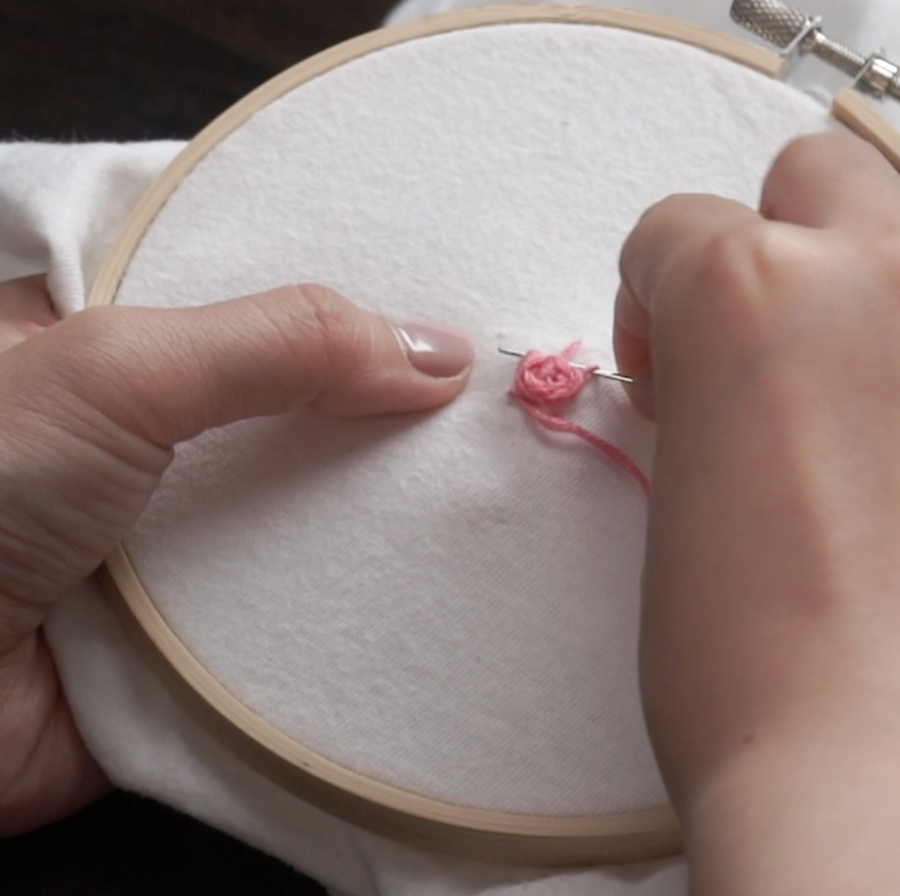
- Pass the needle through the center of the asterisk, then bring the needle under and over 2 of the straight stitches, continue to weave the thread around the asterisk for 10 more times, you will notice the thread is slowly forming a flower-like shape as you go on.
- When the flower has reached your desired size, cut off the excess thread and secure it with a knot.
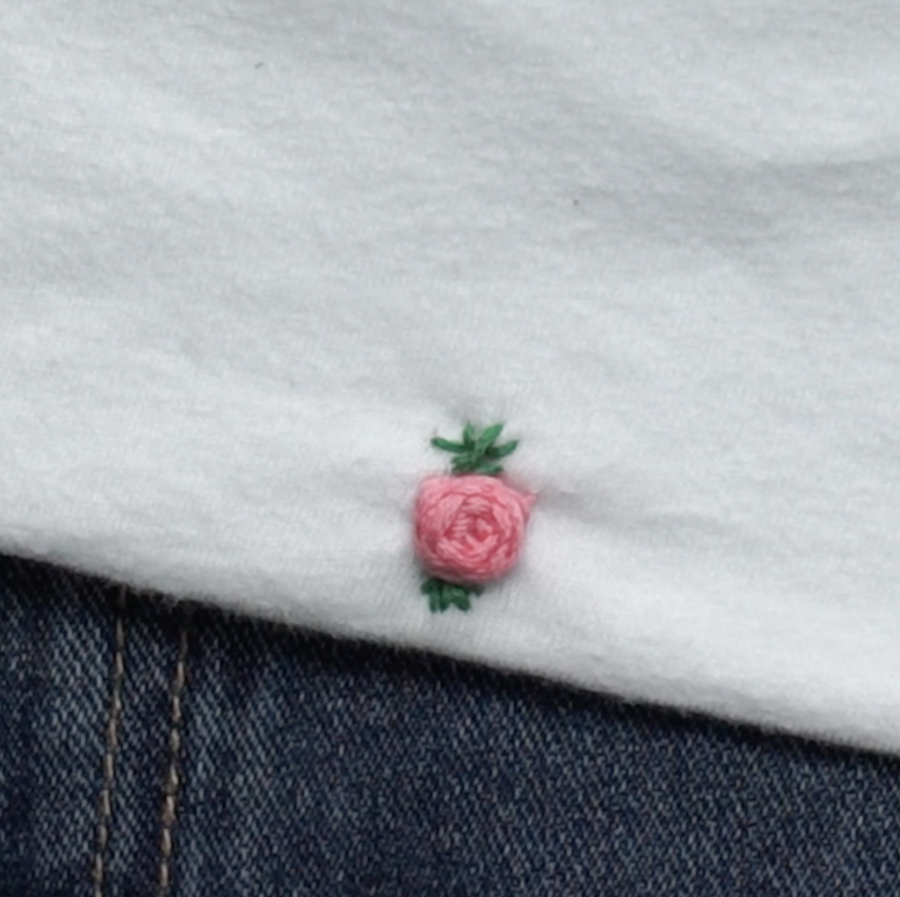
- Thread the needle with the green embroidery floss, pass the needle around the side of the flower to create 4-5 slanted straight stitches to resemble leaves, do the same for the opposite side of the flower. Cut off excess thread and secure it with a knot.
Video Tutorial
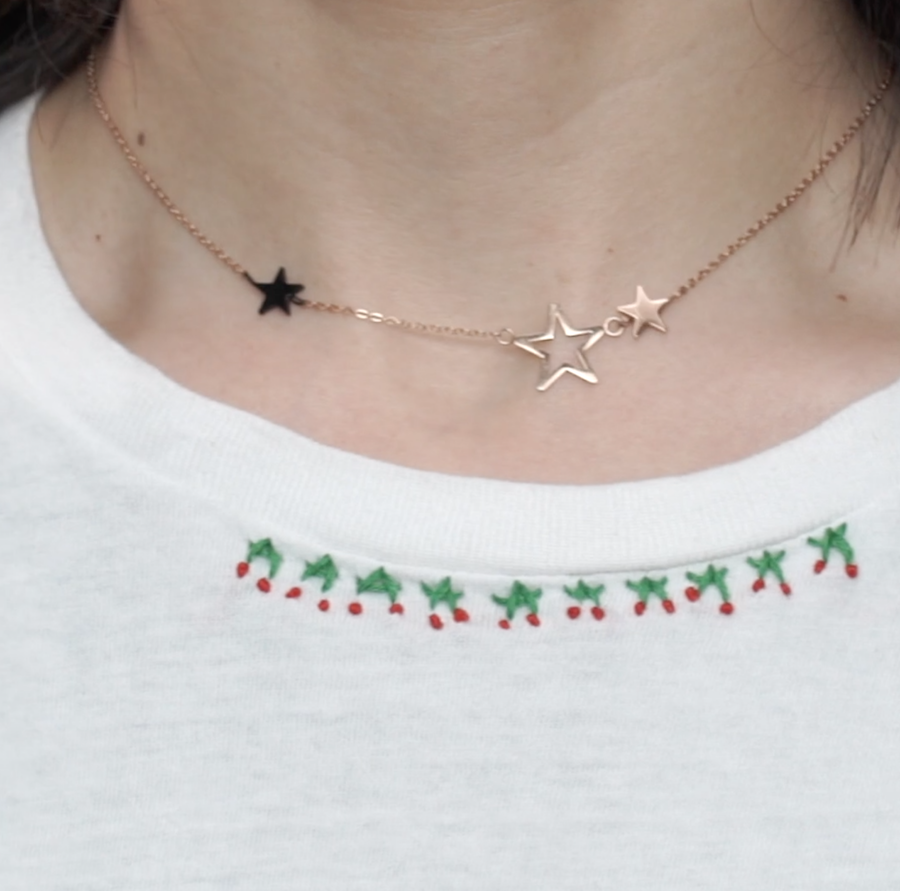
Follow our video tutorial above and check out our end results!
Tried making it at home? Share your results with us on Facebook, or Instagram.


